Moving on to the exhaust system. The following needs to be accomplished:
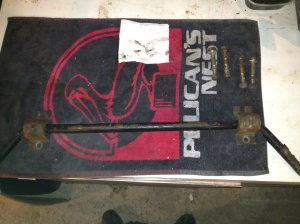
- Remove rear anti roll bar (ARB).
- Remove/drop main exhaust section from the y-piece to the rear tail pipes.
- Unclamp y-piece from manifolds and remove.
- Remove manifolds.
First off the rear ARB needs to be removed. This is held to the chassis via 2 brackets and then connects to the rear wishbones via a pair of drop links. Nice and simple. Remove the 2 nuts on each bracket. The brackets can be found attached to the underneath of the forward rear lower wishbone mounts. They are semi-circular and have 2 nuts each. Undo each nut on the top of the drop link and the ARB drops away. The upper drop link mounts are the triangular sections on the lower wishbones.
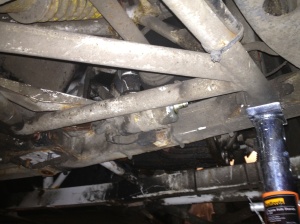 Near side bracket is on the very left of the picture. Its the nice shiny white part. The 2 threads can also be seen that the nuts described above screw on to
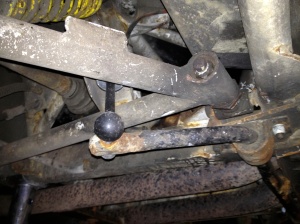 Clamp to chassis on right. Also notice the drop link attached to the end of the ARB connecting up to the wishbone
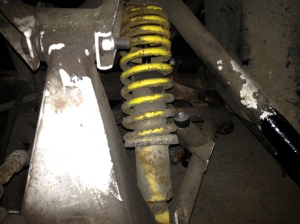 Top of drop link passing through the wishbone
To strip the ARB down completely just pull the metal brackets off the rubber bushes. The bushes are actually split on one side. Grab the bush on each side of the split and pull. The bush should then slip off the ARB.
So, on to the main rear exhaust section. This runs the length of the car from the bottom of the y-piece to the rear. Pretty simple in all. The exhaust is bolted to a large rectangular plate which is then bolted to the chassis. You can’t miss the plate, it has 2 large holes in it, through which you can see the silencer box. There is also another bolt that passes through a flange welded to the exhaust and is screwed into the actual engine block. Finally there is a simple clamp around the pipe at the very front. This helps secure the exhaust to the y-piece.
Once the front bolt and the plate bolts are released, undo the 2 nuts on the front clamp and it will pull apart. The exhaust should now just slide out of the bottom of the y-piece. I placed my trolley jack on the plate to support the weight, lowered it just slightly and then pulled the jack out towards the rear of the car. A second pair of hands here can help. Don’t be afraid to give it a good pull by grabbing the exhaust tips. The exhaust can get stuck on the y-piece after years of dirt and corrosion taking hold.
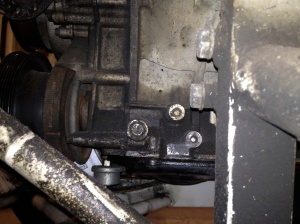 It looks like there are 2 holes that the front flange on the exhaust clamps to the engine with, but only 1 is actually threaded
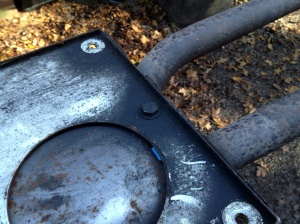 Rear of exhaust to chassis plate
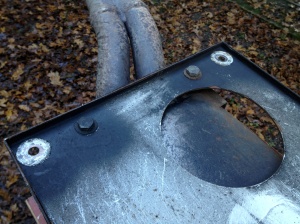 Front of exhaust to chassis plate
The clean looking holes on the above 2 pictures are where the plate bolts to the chassis. There are also 2 more in the middle giving a total of 6. There are then 3 bolts that connect the plate to the exhaust. 2 at the front and 1 at the back in the middle. The 3 exhaust to plate bolts also pass through some rubber mountings that sit on either side of the silencer box brackets.
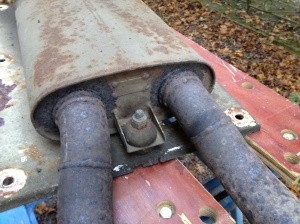 One of the rubber mounts as described above
My next action was to remove the swirl pot in the engine bay to make removing the y-piece easier. I’ve read that its possible to remove it with the swirl pot in place, but I couldn’t on my car, there just wasn’t enough room.
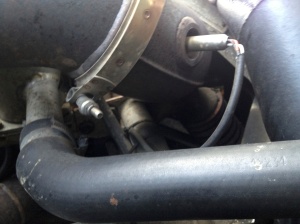
Remove the top hose connection on the swirl pot as per what ever previous method you used when removing the radiator hoses. Removal of the smaller hose on the side of the swirl pot leading to the expansion tank is also necessary. This is held on with a special jubilee clip with a bend in it, just loosen. You’ll possibly lose some more coolant so be prepared. The swirl pot is simply bolted to the engine cross member by 4 bolts. Just remove these and out it lifts (of course having remembered to use penetrating fluid with all these rusty bolts…)
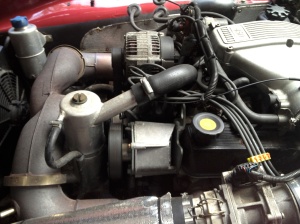 Swirl pot visible on left hand side with hose to expansion tank on left (jubilee clip as well) and larger hose on right
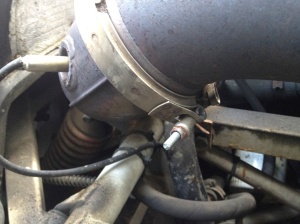
Next up is to release the clamps between the y-piece and the manifolds. Undo the nut on the clamp and give them a tap with a rubber mallet. They should just spring open and release.
Once released its a case of wiggling the y-piece out. Its tricky but it will come out.
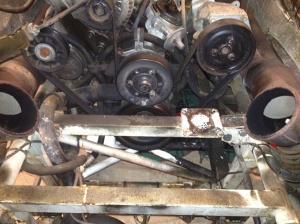 Y-piece removed (note the square ledge on the right of the cross member. This is what the swirl pot you’ve just removed sits on)
Now comes the hard part. Removing the manifolds. The body cannot be lifted with them still in place, it just isn’t wide enough. The only other option you have is to remove the entire engine with the manifolds still attached. I didn’t take this route of course so I’m afraid I can’t comment.
In theory this should be quite simple. There are 16 bolts to undo, 2 per exhaust port. The problem arises when you realise that, with the design of the pipes as they move away from the block, its almost impossible to get a socket/ratchet spanner on the end of the bolts. There just isn’t enough room again. I tried all sizes of socket, uj extension pieces, ratchets … nothing. So, standard spanners it is then.
Most of the top bolts are ok to get at. It still took me a while as I found I could only turn a bolt a couple of flats at a time due to there not being enough room to move the spanner in. Very do-able, just slow going. The bottom bolts are harder. The only real way to get even semi decent access is to come in from below. Again its a case of just undoing a little at a time. I made life much harder for myself by not removing the starter motor. Take note … remove this, it makes things much easier. The other point to mention is to soak all the bolts with penetrating fluid for a few days before going for it. Shearing a bolt here takes you down the road of having to remove the heads and get the offending bolt stem drilled out…
I don’t have any photos of this as it was pretty hard going just removing the bolts never mind holding a camera as well. Also, I’ve read quite a few different ways of doing this. It really depends on what works for you. Some have managed to removal all bolts from the top. Once you’ve started you’ll know the best course to take. Its the classic case of taking hours (yes, HOURS) the first time you do it, but on subsequent goes it becomes much easier.
NOTE: An important point to remember. One of the bolts will not come all of the way out of the engine. Its the second back from the front on the bottom row. It will start to contact the manifold. You will need to pull the manifold away from the engine as you undo the bolt. This will all make sense when you try. Yes its a pain, but you don’t have a choice unfortunately. There is one bolt like this on each manifold. Once all the bolts are out then carefully pull the manifolds out. The near side can be removed straight up (for me at least). The off side must be pulled out forwards towards the front of the car as the heater rail pipes get in the way. These are 2 metal pipes that are attached to the off side head which take coolant/hot water to the heater matrix and thus provide hot air inside the cabin.
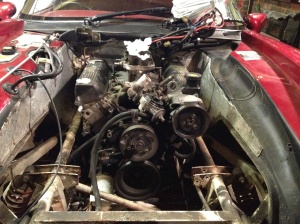 Manifolds and y-piece removed (loom also removed at top right, more on this later)
Another job to tick off the list, exhaust system now totally removed.
